打开微信,使用扫一扫进入页面后,点击右上角菜单,
点击“发送给朋友”或“分享到朋友圈”完成分享
1.下载源代码
git clone git@172.10.80.76:video/cnstream.git
2.切换分支
git checkout Style_Transfer
3.进入代码目录
cd cnstream
4.编译代码
mkdir build
cd build
cmake ..
make -j8
5.前处理定义
因为style_transfer的前处理与我们之前的前处理稍有不同,所以也需要自己定义
class PreprocStyle_transfer : public Preproc, virtual public libstream::Reflex Ex {
 public:
  /**
   * @brief Execute preproc on origin data
   *
   * @param net_inputs: neural network inputs
   * @param model: model information(you can get input shape and output shape from model)
   * @param package: smart pointer of struct to store origin data
   *
   * @return return 0 if succeed
   *
   * @attention net_inputs is a pointer to pre-allocated cpu memory
   */
  int Execute(const std::vector& net_inputs, const std::shared_ptr& model,
    const CN InfoPtr& package) override;
  DECLARE_REFLEX_ _EX(PreprocStyle_transfer, Preproc);
};  // class PreprocStyle_transfer
定义PreprocStyle_transfer类继承父类Preproc,并且实现父类的虚函数Execute,net_inputs中可以获取网络输入,model中可以获取模型的规模,package可以拿到原图
int PreprocStyle_transfer::Execute(const std::vector& net_inputs, const std::shared_ptr& model,
    const CN InfoPtr& package) {
  // check params
  auto input_shapes = model->input_shapes();
  if (net_inputs.size() != 1 || input_shapes[0].c() != 3) {
    LOG(ERROR) << "[PreprocCpu] model input shape not supported";
    return -1;
  }
  DLOG(INFO) <frame.width;
  int height = package->frame.height;
  int dst_w = input_shapes[0].w();
  int dst_h = input_shapes[0].h();
  uint8_t* img_data = new uint8_t[package->frame.GetBytes()];
  uint8_t* t = img_data;
  for (int i = 0; i frame.GetPlanes(); ++i) {
    memcpy(t, package->frame.data[i]->GetCpuData(), package->frame.GetPlaneBytes(i));
    t += package->frame.GetPlaneBytes(i);
  }
  // convert color space
  cv::Mat img;
  switch (package->frame.fmt) {
    case cnstream::CNDataFormat::CN_PIXEL_FORMAT_BGR24:
      img = cv::Mat(height, width, CV_8UC3, img_data);
      break;
    case cnstream::CNDataFormat::CN_PIXEL_FORMAT_RGB24:
      img = cv::Mat(height, width, CV_8UC3, img_data);
      cv::cvtColor(img, img, cv::COLOR_RGB2BGR);
      break;
    case cnstream::CNDataFormat::CN_PIXEL_FORMAT_YUV420_NV12: {
      img = cv::Mat(height * 3 / 2, width, CV_8UC1, img_data);
      cv::Mat bgr(height, width, CV_8UC3);
      cv::cvtColor(img, bgr, cv::COLOR_YUV2BGR_NV12);
      img = bgr;
    } break;
    case cnstream::CNDataFormat::CN_PIXEL_FORMAT_YUV420_NV21: {
      img = cv::Mat(height * 3 / 2, width, CV_8UC1, img_data);
      cv::Mat bgr(height, width, CV_8UC3);
      cv::cvtColor(img, bgr, cv::COLOR_YUV2BGR_NV21);
      img = bgr;
    } break;
    default:
      LOG(WARNING) << "[Encoder] Unsupport pixel format.";
      delete[] img_data;
      return -1;
  }
  // resize if needed
  if (height != dst_h || width != dst_w) {
    cv::Mat dst(dst_h, dst_w, CV_8UC3);
    cv::resize(img, dst, cv::Size(dst_w, dst_h));
    img.release();
    img = dst;
  }
  // since model input data type is float, convert image to float
  cv::Mat dst(dst_h, dst_w, CV_32FC3, net_inputs[0]);
  img.convertTo(dst, CV_32FC3);
  float mean_value[3] = {
    122.5814138,
    116.5541927,
    103.8942281,
  };
  cv::Mat mean(512, 512, CV_32FC3, cv::Scalar(mean_value[2], mean_value[1], mean_value[0]));
  cv::Mat subtracted;
  cv::subtract(dst, mean, subtracted);
  auto input_data = net_inputs[0];
  std::vector channels(3);
  for (int j = 0; j < 3; j++) {
    cv::Mat split_image(512, 512, CV_32FC1, input_data);
    channels.push_back(split_image);
    input_data += 512 * 512;
  }
  cv::split(dst, channels);
  delete[] img_data;
  return 0;
}
与我们自带的CPU前处理的不同之处仅仅是多了一个split的过程
6.后处理类定义
class PostprocStyle_transfer : public Postproc, virtual public libstream::Reflex Ex {
 public:
  /**
   * @brief Execute postproc on neural style_transfer network outputs
   *
   * @param net_outputs: neural network outputs
   * @param model: model information(you can get input shape and output shape from model)
   * @param package: smart pointer of struct to store processed result
   *
   * @return return 0 if succeed
   */
  int Execute(const std::vector& net_outputs,
      const std::shared_ptr& model,
      const CN InfoPtr& package) override;
 private:
      DECLARE_REFLEX_ _EX(PostprocStyle_transfer, Postproc)
};  // class PostprocStyle_transfer
定义自己的类PostprocStyle_transfer继承父类Postproc,并且实现父类的虚函数Execute,net_outputs中可以获取网络输出,model中可以获取模型输出的规模,package可以拿到原图
int PostprocStyle_transfer::Execute(const std::vector& net_outputs,
      const std::shared_ptr& model,
      const CN InfoPtr& package) {
  if (net_outputs.size() != 1) {
    std::cerr <output_shapes()[0];
  int im_w = sp.w();
  int im_h = sp.h();
  auto pdata = net_outputs[0];
  cv::Mat i(im_w, im_h, CV_32FC1, pdata);
  std::vector mRGB(3), mBGR(3);
  for (int i = 0; i < 3; i++) {
    cv::Mat img(im_w, im_h, CV_32FC1, pdata+im_w*im_h*i);
    mBGR[i] = img;
  }
  cv::Mat R,G,B;
  mBGR[0].convertTo(R,CV_8UC1);
  mBGR[1].convertTo(G,CV_8UC1);
  mBGR[2].convertTo(B,CV_8UC1);
  mRGB[0] = R;
  mRGB[1] = G;
  mRGB[2] = B;
  cv::Mat img_merge(im_w, im_h, CV_32FC3);
  cv::merge(mRGB,img_merge);
  static int out = 0;
  std::string out_name = std::to_string(out++) + ".jpg";
  imwrite(out_name, img_merge);
  return 0;
}
7.运行程序
cd ../samples/detection-demo/
./run_style.sh
运行程序用到一个json文件和一个run脚本
style_config.json:
{
  "source" : {
    "class_name" : "cnstream::DataSource",
    "parallelism" : 0,
    "next_modules" : ["detector"],
    "custom_params" : {
      "source_type" : "ffmpeg",
      "output_type" : "mlu",
      "decoder_type" : "mlu",
      "device_id" : 0
    }
  },
  "detector" : {
    "class_name" : "cnstream::Inferencer",
    "parallelism" : 4,
    "max_input_queue_size" : 20,
    "custom_params" : {
      "model_path" : "../data/models/MLU100/style_transfer/japan_8mp.cambricon",
      "func_name" : "subnet0",
      "preproc_name" : "PreprocStyle_transfer",
      "postproc_name" : "PostprocStyle_transfer",
      "device_id" : 0
    }
  }
}
model_path有两个,在同一个文件夹下,一个是japan_8mp.cambricon, 一个是modern_8mp.cambricon;这是两个不同的风格,模型下载地址:https://github.com/Cambricon/models/tree/master/MLU100/style_transfer
#!/bin/bash
#*************************************************************************#
# @param
# drop_rate: Decode Drop   rate (0~1)
# src_ _rate:   rate for send data
# data_path: Video or image list path
# model_path: offline model path
# label_path: label path
# postproc_name: postproc class name (PostprocSsd)
# wait_time: time of one test case. When set tot 0, it will automatically exit after the eos signal arrives
# rtsp = true: use rtsp
# input_image = true: input image
# dump_dir: dump result videos to this directory
# loop = true: loop through video
# device_id: mlu device id
#
# @notice: other flags see ./../bin/detection --help
#*************************************************************************#
source env.sh
mkdir -p output
./../bin/detection  \
    --data_path ./files.list_video \
    --src_ _rate 27   \
    --wait_time 0 \
    --rtsp=false \
    --input_image=false \
    --loop=false \
    --config_fname "style_config.json" \
    --alsologtostderr
默认输入为video, 目录下有files.list_video,也可以改为image,data_path改为files.list_image, input_image改为true即可
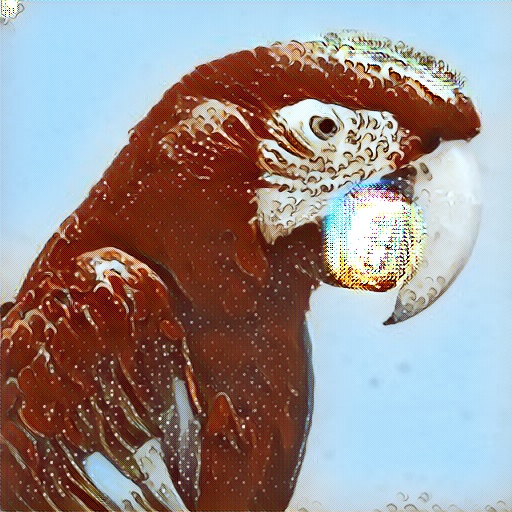
8.执行结果示例
原图

运行结果

热门帖子
精华帖子